


1. Cut 2 sheets of 110# card to size for base and top of box. Mine is 9 1/2 inches by 7 1/2 inches which will make a box to accommodate my 5 x 7 card.
2.Trim 1/8 inch from one side and one end for the base.
3. Score at 1 inch from all edges on top and base panels.
4. Cut each corner to score line and cut narrow triangles from both edges of that tab as shown in the photo.
5. Fold your score lines and glue corners.
6. Secure with clips and allow to dry.
If you should happen to have a different sized card to make your box for, the formula is as follows to determine what size panels you will need to cut:
1. Add 1/2 inch to size of your card to get your width x length measurements. For my example for 5 x 7 card it is 5 1/2 x 7 1/2 inches.
2. Now figure what depth you want your box to be to accommodate the embellishments or layers on your card. I used 1 inch, which gives me plenty of head room. Multiply that by 2, which gives me 2. (If you needed a 1 1/2 inch deep box you would come up with 3.)
3. Add the above number (2 for my example) to each of your width x length measurements. I got 7 1/2 x 9 1/2 inches. This will be the size panel you need to cut-one for the top and one for the base of the box.
4. Follow steps 2 through 8 above to complete your box.
Now onto the fun stuff...
Here's how I made my 'flocked wallpaper' background.

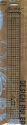
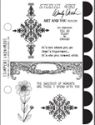
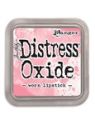
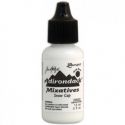
1. Stamp Wendy Vecchi damask image on center of panel which has been cut to appropriate size--I used Mixed Media card. Tim Holtz' Design Ruler is very helpful in finding your center. I inked the stamp with Worn Lipstick Distress Oxide and spritzed the inked stamp lightly with water before making my impression.
2. Repeat with smaller damask image from the same set and heat dry.

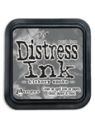
3. Blend panel with Hickory Smoke Distress ink.
4. Spritz with water using slow pull on trigger of Distress Water Spritzer for larger droplets.
5. Dry with heat tool, blotting water spots with paper towel to remove some color.

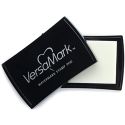
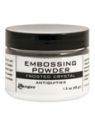
6. Blot panel with Versamark pad, covering the entire surface with ink, cover with Ranger Frosted Crystal Antiquities embossing powder and pour excess back into jar. I love that Ranger offers this in a large jar-perfect for these larger projects.
7. Heat with a heat tool just until melted--it's difficult to see so don't overdo it. You will get a shimmery matte surface.

8. Scribble with Picket Fence Distress Crayon randomly (or as much as you like--I ran out of crayon; I wish they offered the crayons in a larger size!)

9. Run to store and buy another set of crayons to finish the panel. Heat with heat tool to melt the crayon into the powder. You will get a silky smooth finish that has the appearance of flocking. Because it's melted into the powder, it won't come off when you run your hands over it.

10. Adhere panel to complete box with Distress Collage Medium. Blend edges of box top with Hickory Smoke ink. (In hindsight, I would have adhered the panel before folding and gluing the box top, so I could use my books/paperweight to flatten.)

11. Make a puddle of DOX and water and dip crinkle ribbon into it, spritz with water to disperse the color.
12. Wrinkle ribbon and wad into a ball to dry. I love this crinkle ribbon from The Funkie Junkie Boutique. It crinkles and takes color nicely. It comes wrapped on a pretty ephemera card, tied up with hand dyed ribbon and a floral button--all of which you can use on another project.

14. Make fluffy bow from dyed seam binding and tie around box. I made it so the recipient can just slide this off the box.


Thank you for taking your time to visit Frilly and Funkie today and for your lovely comments you leave!
Hugs and Blessings!
Sara Emily
The following are links to the products I used that can be purchased at The Funkie Junkie Boutique:
 |  |  |  |  |
 |  |  |  |  |
 |  |  |  |  |

Wow!! This is wonderful Sara with a fabulous step by step tutorial. I love the flocked background .. it is so pretty and I have bookmarked it for future reference. The embellishments are gorgeous and your box beautifully complements your stunning card!! Thank you for the inspiration!! xx
ReplyDeleteGorgeous background tutorial Sara Emily. Haven't got all those supplies but will have to give it a go with a bit of improvisation! Have a wonderful weekend xxx
ReplyDeleteBeautiful!!! love the box and your tutorial is fantastic!
ReplyDeleteSTUNNING and EXQUISITE. Fabulous tutorial. Xj.
ReplyDeleteOh wow Sara, I am totally in love with your gorgeous box, which matches your card beautifully! Thank you so much for sharing how to do the box, and the sizing, that is so helpful. I love your 'flocking' technique, I will definitely be giving that a go - you are so clever!! Hugs, Anne xx
ReplyDeleteFabulous!
ReplyDeleteJust lovely! What a beautiful set and wonderful detailed tutorial. Kim :)
ReplyDeleteWhat a great step out Sara! Such a fun technique and a gorgeous project! Thanks for sharing!
ReplyDeleteFlocked wallpaper technique - whoa! That is an incredible idea. I especially like the run to the store to buy another set of crayons. Can't forget that step. Thank you for sharing this idea.
ReplyDeleteStunning! What a gorgeous technique too, one I've never heard of but one I will be trying. Thank you Sara Emily xx
ReplyDeleteThis technique is so cool! I love how you changed the dynamics by adding the crayon. What fun! Making boxes is something I always have on the to do list, but seldomly accomplish. I'll be pinning for reference, since I almost ALWAYS make 5x7 sized cards. Love love the key too! Hugs, Autumn
ReplyDeleteThis is gorgeous Sara! I'm always so impressed
ReplyDeleteInteresting flocked wallpaper technique and the chalk painted key! I'm going to have to give this one a try
ReplyDeleteThank you for the really kind comments on my tutorial and box! Made my day! Hugs! Sara Emily
ReplyDeleteThis is stunning, Sara Emily! Thank you for sharing the technique - hope to try it out sometime. Hugs!
ReplyDelete